Khoya recipe in a quick way with step by step picture format. It is also known as khoa or khova in India, it’s actually evaporated milk solids. When the milk in a deep bottom pan or iron wok, has to be evaporated about one-fifth of its real amount by simmering the heat, is called khoya or khoa. But today I’ll show the way of making easy khoa or mawa recipe. It’s an easy and quick way with a medium-high heat by using my own tricks and tips.
Basically, we Indians use khoya or mawa as a main ingredient of sweets, especially in north India. Different types of khoa, such as hard, soft and granulated khova, all we use to make different sweets, according to its requirement.
Though the making of homemade mawa is really time-consuming, its purity never makes me feel tired while making it. I always prefer to make my own khoa at home, that’s not only pure and hygiene it saves your money too. It looks very hard working(because of its long preparation time) but I apply some tricks to make the task easier. And all the tricks explained below for this khoa recipe.
Firstly, I use a non-stick pan, which should be a deep and thick bottom. secondly, I use a wooden ladle and always place it vertically on the pan, to prevent the overflowing of the milk froth. And thirdly, keep the flame just exactly middle point of medium to high heat, especially when I need to make khoa or khova, but time is less in my hand.
We generally use this khoa for making sweets as well as curries. Our biggest festival Durga Puja is coming and I’m going to prepare some sweets, where khoa or mawa is sometimes an important ingredient so that is the reason behind this post.
Here I describe how to make khoya in a quick way, on exactly the medium-high flame, which is less time consuming but your continued involvement is needed for this recipe. After making this khova, you can store in the refrigerator for 4-5days.

But If you are searching for khova or mawa recipe making in a low flame then you must see my doodh peda recipe. Where I can save my time throughout the first part of this cooking process, means until the milk reaches its half amount. Till the time(reaches half amount) you may stir and scrap the milk, after every 3-4 mins. But in this easy khoya recipe, your continuous effort is required from the beginning to the end.
You may try my Bengali sweets, sandesh recipe or bengali sandesh-misti, chandrapuli sandesh recipe, chanar jeelabi or Bengali chana jilipi or paneer jalebi recipe and must check my Chenna recipe or how to make Chenna recipe(the main ingredient of Bengali sweets).
Follow my every steps and trick for making this easy khoya or mawa recipe and Please, let me know how useful this process was by leaving a comment in the comment section below.
Easy khoya recipe in a quick way
Ingredients
- 1 litter full-fat milk or whole milk
Cook time: 45-47 mins
Total time: 45-47 mins
Course: Sweet
Cuisine: Indian
Servings: 3/4 cup
Author: Moumita
How to make easy khoya recipe in a quick way with step by step pictures at home
Instructions:
How to make easy khoya or mawa at home
- Take a thick deep bottomed non-stick pan and place it on the flame. The flame should be just exactly middle point of medium to high heat.
- Add the milk to the pan and bring it to boil.
- And stir the milk after every 1 min by a wooden ladle.

- Place the wooden ladle diagonally on the mouth of the pan, it will prevent the milk from overflowing. As shown in the pic.

- While stirring the milk, always scrap the bottom and the inner sides of the pan, prevent from burning.
- When the milk will evaporate half of its real amount, then start stirring it in every 30 secs. As you can see in this pic.

- See after 30 mins, milk will be more thickened then keep stirring and scraping the pan after every 10-15 secs. The thickness of the milk is shown in the pic.

- After 35 mins the milk will get the consistency of rabri. As shown in the pic. Then start stirring and scraping the milk in 5-10 secs.

- This is the most important time when milk gets thicken so quickly. That’s the reason for continuous stirring to get the perfect khova.
- After 40-42 mins, we will get a soft, moist khoa with a very thick consistency. Which is perfect for making any sweet just like doodh peda.

- Within 45-47 mins khoa will be gradually ready in the pan. When the khoa will start leaving the pan, that indicates khova or mawa is ready.

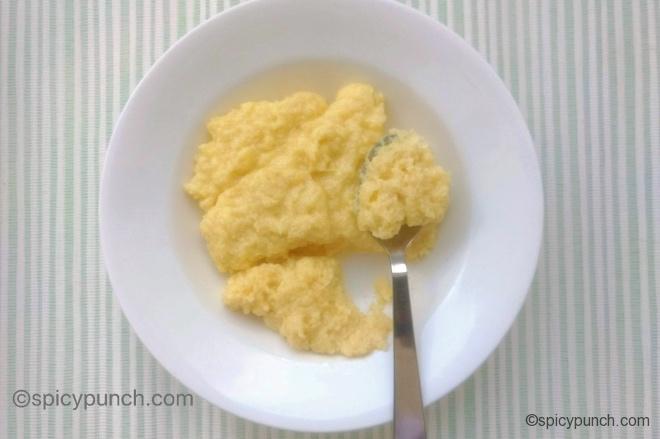
- Turn off the heat and immediately transfer the khova or mawa to a plate or bowl. This is a perfect khova with its perfect softness.

- Completely cool it down and then store it in the refrigerator for the next 4-5 days in an airtight container.
- It took 45-47 mins for me on medium to high heat.
- Here I’ve shared my khoa or mawa recipe, which I generally store in the refrigerator. And then I use it in my sweets, by making it soft in my way. As I have described in my chanar jeelabi or Bengali chanar jilipi or Panner jalebi recipe.
Tips
- Though my khoa making process is a quick method of making khoa, don’t unattended the milk during the process. Do it with great care and easily get authentic khoa.
- You can make this khoa by heating the milk in the lowest flame of your oven. Though that will take more time and continuous involvement is not required at the beginning.
- While stirring the milk, don’t forget to scrap its bottom and the inner side of the pan. Because those are milk solids have a natural tendency to stick to the bottom and sides of the pan. And if don’t scrap it, it might be a cause of the little-burnt smell.
- The quantity of khova may differ because of your milk quality.